C#
画像/描画
画像の表示 (PictureBox)
// PictureBox に、TextBox で指定されたファイルの画像を表示する
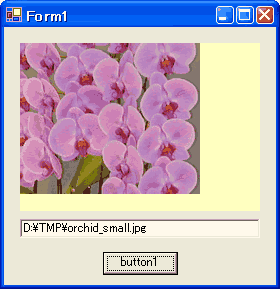 配置 PictureBox, Button, TextBox ;
private void button1_Click(object sender, System.EventArgs e)
{
try
{
pictureBox1.Image = Image.FromFile(textBox1.Text) ;
}
catch
{
MessageBox.Show("指定が正しくありません!") ;
}
}
// Note: 表示位置は、SizeMode プロパティで設定する。
// Normal = 左上隅に表示(既定値)
// CenterImage = 中央 に表示
// AutoSize = 左上隅に表示(PictureBox の背景色は表示しない)
// StretchImage = 画像を伸縮し、PictureBox の領域いっぱいに表示
// Note: PictureBox は、BMP/GIF/JPEG/PNG/TIFF/ICON 形式をサポートしている。
画像の表示 (Label)
// Label に、TextBox で指定されたファイルの画像と、テキストを表示する
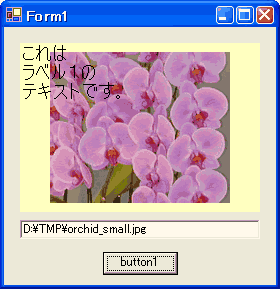 配置 Label, Button, TextBox ;
private void button1_Click(object sender, System.EventArgs e)
{
try
{
label1.Text = "これは\nラベル1の\nテキストです。" ;
label1.Image = Image.FromFile(textBox1.Text) ;
}
catch
{
MessageBox.Show("指定が正しくありません!") ;
}
}
// Note: 表示位置は、ImageAlign プロパティで設定する。
// MiddleCenter = 中央 に表示(既定値)
// TopLeft = 左上隅に表示
// Note: Label は、BMP/GIF/JPEG/PNG/TIFF/ICON 形式をサポートしている。
画像の形式判定
// 画像データの形式を判定する(ファイル名からではなく、データから判定する)

Bitmap bmp = new Bitmap("D:\\TMP\\orchid_small.jpg") ;

string format = bmp.RawFormat.ToString() ;  // bmp の画像形式を文字列で取得

string ext =                                // 画像の拡張子を求める
    (format.IndexOf("b96b3cab-0728-11d3-9d7b-0000f81ef32e") != -1) ? "bmp" :
    (format.IndexOf("b96b3cb0-0728-11d3-9d7b-0000f81ef32e") != -1) ? "gif" :
    (format.IndexOf("b96b3caf-0728-11d3-9d7b-0000f81ef32e") != -1) ? "png" :
    (format.IndexOf("b96b3cae-0728-11d3-9d7b-0000f81ef32e") != -1) ? "jpg" :
    (format.IndexOf("b96b3cb1-0728-11d3-9d7b-0000f81ef32e") != -1) ? "tif" :
    (format.IndexOf("b96b3cb5-0728-11d3-9d7b-0000f81ef32e") != -1) ? "ico" :
    "xxx" ;
画像の形式変換と保存
// PictureBox に画像を表示し、それを ComboBox で指定された 画像形式 に変換して、
// ファイル保存する
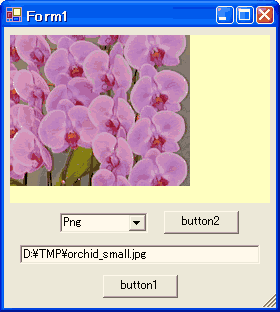 配置 PictureBox, Button, Button, ComboBox, TextBox ;
using System.Drawing.Imaging ; // for ImageFormat
private void button1_Click(object sender, System.EventArgs e)
{
// 画像の表示
try
{
pictureBox1.Image = Image.FromFile(textBox1.Text) ;
}
catch
{
MessageBox.Show("指定が正しくありません!") ;
return ;
}
}
private void button2_Click(object sender, System.EventArgs e)
{
// 画像形式の変換&保存
ImageFormat image_format1 ;
switch (comboBox1.Text)
{
case "Bmp" : image_format1 = ImageFormat.Bmp ; break ;
case "Gif" : image_format1 = ImageFormat.Gif ; break ;
case "Jpeg" : image_format1 = ImageFormat.Jpeg ; break ;
case "Png" : image_format1 = ImageFormat.Png ; break ;
case "Tiff" : image_format1 = ImageFormat.Tiff ; break ;
default : image_format1 = ImageFormat.Bmp ; break ;
}
pictureBox1.Image.Save(
textBox1.Text + "." + comboBox1.Text, // 保存するファイル名
image_format1) ; // 保存する画像形式
}
// Note: Image.Save() は、ファイルを強制上書きモードで保存する。
画像を exe に埋め込む
// 画像ファイルを、実行ファイルに埋め込む
// 埋め込まれた 画像ファイル "image1.jpg" を、PictureBox に表示する
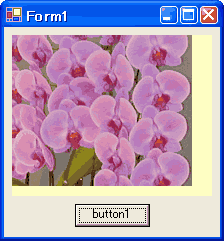 // (1) 画像ファイル "image1.jpg" を埋め込む
ソリューションエクスプローラで、追加 → 既存項目の追加 を選択すると、ダイアログ
が開くので、そこで、埋め込みたいファイル "image1.jpg" を選択する(このファイルは、
プロジェクト フォルダへ自動的にコピーされる)。
次に、このプロパティのページを開き、ビルドアクションを「埋め込まれたリソース」に
設定する。
// (2) 埋め込まれた画像データを取り出す
配置 PictureBox, Button ;
private void button1_Click(object sender, System.EventArgs e)
{
Bitmap bit_map1 = new Bitmap(GetType(), "image1.jpg") ; // データを取り出す
pictureBox1.Image = bit_map1 ; // 画像の表示
}
// Note: 同様のことをテキストで行う場合は、テキストを exe に埋め込む を参照。
画像のピクセルデータ操作
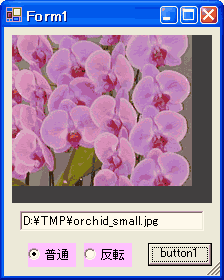
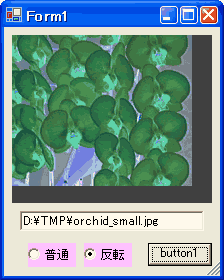
// PictureBox に、指定されたファイルの画像を「反転色」表示する

// ビットマップデータ(色情報)を1ピクセルごとに取得して、反転色を計算した後、
// それを、別のビットマップデータに設定する
| ⇒ |
|
配置
PictureBox, Button, RadioButton, RadioButton, TextBox ;
using System.Drawing.Imaging ; // for
PixelFormat
private void button1_Click(object sender, System.EventArgs e)
{
// 読み込む画像の格納用ビットマップの宣言
Bitmap bit_map1 = null ;
try {
// textBox1 で指定された画像ファイルをロード
bit_map1 = new
Bitmap(textBox1.Text) ;
}
catch {
MessageBox.Show("ファイルがNGです!", Application.ProductName) ;
return ;
}
int sizeX = bit_map1.
Width ;
int sizeY = bit_map1.
Height ;
// 加工した画像の格納用ビットマップの宣言(32bitカラー
ピクセル形式)
Bitmap bit_map2 = new
Bitmap(sizeX, sizeY,
PixelFormat.Format32bppArgb) ;
for (int Y = 0 ; Y < sizeY ; Y ++)
{
for (int X = 0 ; X < sizeX ; X ++)
{
int P = bit_map1.
GetPixel(X, Y).ToArgb() ; // ピクセルデータの取得
if (radioButton2.Checked) P ^= 0xffffff ; // 反転色の計算
bit_map2.
SetPixel(X, Y, Color.FromArgb(P)) ; // ピクセルデータの設定
}
}
pictureBox1.Image = bit_map2 ;
}
// Note: SetPixel() は、対象画像形式が15bitカラー以上のみ使用可能!?
// Note: Bitmap のファイル保存は、Bitmap.Save(ファイル名,
画像形式) で行う。
// Note: Bitmap は、BMP/GIF/JPEG/PNG/TIFF/ICON 形式をサポートしている。
画像の拡大/縮小
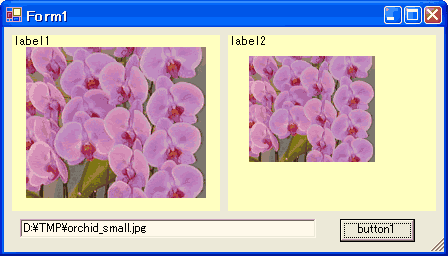
// TextBox で指定されたファイルの画像 を label1 に表示し、その画像を 70% に縮小
// して、label2 に表示する
 配置 Label, Label, Button, TextBox ;
private void button1_Click(object sender, System.EventArgs e)
{
label1.Image = Image.FromFile(textBox1.Text) ;
label2.Image = new Bitmap(label2.Width, label2.Height) ;
Graphics g = Graphics.FromImage(label2.Image) ;
g.ResetTransform() ; // 各変換設定値のリセット
g.ScaleTransform(0.7F, 0.7F) ; // X軸とY軸の拡大率の設定
g.DrawImage(label1.Image, 30, 30) ; // 描画(label1 を元に 指定した座標へ)
}
描画を行う (OnPaint)
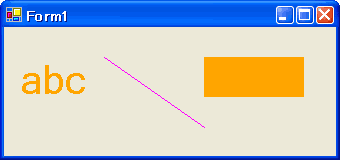
// Form に対して描画を行う
// Paint イベントハンドラをオーバーライドして、描画を行う方法
 protected override void OnPaint(PaintEventArgs pea)
{
// Graphics オブジェクトの取得
Graphics grfx = pea.Graphics ;
// フォント、ペン、ブラシの定義
Font font = new Font("MS P ゴシック", 30F) ;
Pen pen = new Pen(Color.Magenta) ;
SolidBrush brush = new SolidBrush(Color.Orange) ;
// 文字列を描画する
grfx.DrawString(
"abc", // 描画文字列
font, // Font
brush, // SolidBrush
10, // X位置(左上の)
30 // Y位置(左上の)
) ;
// 直線を描画する
grfx.DrawLine(
pen, // Pen
100, // X1位置
30, // Y1位置
200, // X2位置
100 // Y2位置
) ;
// 四角形の内部を塗りつぶす
grfx.FillRectangle(
brush, // SolidBrush
200, // X位置(左上の)
30, // Y位置(左上の)
100, // Width
40 // Height
) ;
}
// Note: プログラムの記述順に描画が行われるので、記述が 後のもの程、画面の
// 前面に表示される。
// Note: Form のデザイン画面で、イベント の Paint 欄をダブルクリックすると、
// "private void Form1_Paint(...)" が生成されるので、そこに 描画処理
// を記述してもよい。
// Note: プログラムの任意の時点で、OnPaint() を起動したい場合は、そこに、
// Invalidate() を記述する。
描画を行う (PictureBox)
// PictureBox に対して描画を行う
// Paint イベントハンドラをオーバーライドしないで、描画を行う方法
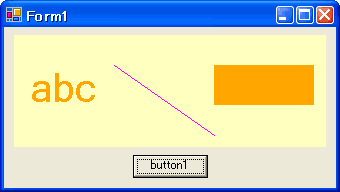 配置 PictureBox, Button ;
private void button1_Click(object sender, System.EventArgs e)
{
// Graphics オブジェクトの取得
pictureBox1.Image = new Bitmap(pictureBox1.Width, pictureBox1.Height) ;
Graphics grfx = Graphics.FromImage(pictureBox1.Image) ;
// フォント、ペン、ブラシの定義
Font font = new Font("MS P ゴシック", 30F) ;
Pen pen = new Pen(Color.Magenta) ;
SolidBrush brush = new SolidBrush(Color.Orange) ;
// 文字列を描画する
grfx.DrawString(
"abc", // 描画文字列
font, // Font
brush, // SolidBrush
10, // X位置(左上の)
30 // Y位置(左上の)
) ;
// 直線を描画する
grfx.DrawLine(
pen, // Pen
100, // X1位置
30, // Y1位置
200, // X2位置
100 // Y2位置
) ;
// 四角形の内部を塗りつぶす
grfx.FillRectangle(
brush, // SolidBrush
200, // X位置(左上の)
30, // Y位置(左上の)
100, // Width
40 // Height
) ;
}
// Note: プログラムの記述順に描画が行われるので、記述が 後のもの程、画面の
// 前面に表示される。
マウスの軌跡を描く
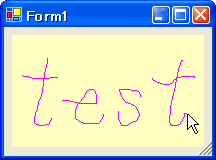
// マウスのボタンが押されている間、その軌跡を描く
// PictureBox に、マウスのイベント位置に対応した DrawLine() を行う
 配置 PictureBox ;
Graphics grfx ; // Graphics オブジェクト
int start = 0 ; // 1 = 描画中
int startX ; // Line X 起点
int startY ; // Line Y 起点
private void Form1_Load(object sender, System.EventArgs e)
{
// Graphics オブジェクトの取得
pictureBox1.Image = new Bitmap(Screen.PrimaryScreen.WorkingArea.Width,
Screen.PrimaryScreen.WorkingArea.Height) ;
grfx = Graphics.FromImage(pictureBox1.Image) ;
}
private void pictureBox1_MouseDown(object sender, System.Windows.Forms.MouseEventArgs e)
{
start = 1 ;
startX = e.X ;
startY = e.Y ;
}
private void pictureBox1_MouseUp(object sender, System.Windows.Forms.MouseEventArgs e)
{
start = 0 ;
}
private void pictureBox1_MouseMove(object sender, System.Windows.Forms.MouseEventArgs e)
{
if (start == 0) return ;
grfx.DrawLine(Pens.Magenta, startX, startY, e.X, e.Y) ;
startX = e.X ;
startY = e.Y ;
pictureBox1.Refresh() ;
}
// Note: マウスが pictureBox1 の領域外でも、pictureBox1 のマウスイベントは発生
// する!?(仕様?)
マウスで直線を引く
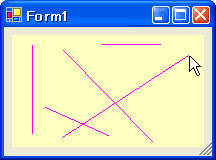
// マウスのボタンを押した位置を始点、離した位置を終点とする直線を引く
// マウスのドラッグ中も、直線の表示(更新)を行う
// PictureBox に、マウスのイベント位置に対応した DrawLine() を行う
 配置 PictureBox ;
Graphics grfx ; // Graphics オブジェクト
int start = 0 ; // 1 = 始点 確定
int startX ; // Line X 始点
int startY ; // Line Y 始点
int end = 0 ; // 1 = 終点 確定
int endX ; // Line X 終点
int endY ; // Line Y 終点
private void Form1_Load(object sender, System.EventArgs e)
{
// Graphics オブジェクトの取得
pictureBox1.Image = new Bitmap(Screen.PrimaryScreen.WorkingArea.Width,
Screen.PrimaryScreen.WorkingArea.Height) ;
grfx = Graphics.FromImage(pictureBox1.Image) ;
}
private void pictureBox1_MouseDown(object sender, System.Windows.Forms.MouseEventArgs e)
{
start = 1 ;
startX = e.X ;
startY = e.Y ;
}
private void pictureBox1_MouseUp(object sender, System.Windows.Forms.MouseEventArgs e)
{
start = 0 ;
if (end == 0) return ;
end = 0 ;
grfx.DrawLine(Pens.Magenta, startX, startY, endX, endY) ;
pictureBox1.Refresh() ;
}
private void pictureBox1_MouseMove(object sender, System.Windows.Forms.MouseEventArgs e)
{
if (start == 0) return ;
end = 1 ;
endX = e.X ;
endY = e.Y ;
pictureBox1.Refresh() ; // マウスのドラッグ中の直線表示を要求
}
private void pictureBox1_Paint(object sender, System.Windows.Forms.PaintEventArgs e)
{
// マウスのドラッグ中の直線表示
if (end == 0) return ;
e.Graphics.DrawLine(Pens.Magenta, startX, startY, endX, endY) ;
}
// Note: マウスが pictureBox1 の領域外でも、pictureBox1 のマウスイベントは発生
// する!?(仕様?)
描画の「ちらつき」をなくす
// Paint イベントハンドラをオーバーライドして描画する時の「ちらつき」をなくす

private void Form1_Load(object sender, System.EventArgs e)
{
    this.SetStyle(
        ControlStyles.DoubleBuffer |         // 描画をバッファで実行する
        ControlStyles.UserPaint |            // 描画は(OSでなく)独自に行う
        ControlStyles.AllPaintingInWmPaint,  // WM_ERASEBKGND を無視する
        true                                 // 指定したスタイルを適用「する」
        ) ;
}

// Note: この設定を行うと、各イベントの中で描画を行っても、そのイベント処理が
//       終了するまで、画面は更新されない!
スクリーン キャプチャ
// アクティブなウィンドウをキャプチャする ( to クリップボード )

SendKeys.SendWait("%{PRTSC}") ;  // "Alt + PrintScreen" キーコードを
                                 //   アクティブウィンドウへ送信する

// Note: SendKeys.SendWait() メソッドについては、キーの自動入力 参照。

// 画面全体をキャプチャする ( to クリップボード )

using System.Runtime.InteropServices ;  // for DllImport

[DllImport("user32.dll")]
extern static IntPtr FindWindow(string lpClassName, string lpWindowName) ;

[DllImport("user32.dll")]
extern static bool SetForegroundWindow(IntPtr hWnd) ;

private void button1_Click(object sender, System.EventArgs e)
{
    string name = "Program Manager" ;       //「画面全体」のウィンドウ名
    IntPtr hWnd = FindWindow(null, name) ;  //「画面全体」の hWnd 取得
    SetForegroundWindow(hWnd) ;             //「画面全体」をアクティブにする

    SendKeys.SendWait("%{PRTSC}") ;         // アクティブウィンドウをキャプチャ

    this.Activate() ;                       // アクティブウィンドウを元に戻す
}

// Note: 単純な SendKeys.SendWait("{PRTSC}") だけではダメ!
//       理由は、キーコード "{PRTSC}" は "%{PRTSC}" に解釈されてしまうから。

// 画面全体をキャプチャする ( to Bitmap )

using System.Runtime.InteropServices ;  // for DllImport

class USER32
{
    [DllImport("user32.dll")]
    public static extern IntPtr GetDC(IntPtr hWnd) ;

    [DllImport("user32.dll")]
    public static extern IntPtr ReleaseDC(IntPtr hWnd, IntPtr hDc) ;
}

class GDI32
{
    public const int SRCCOPY = 0xcc0020 ;

    [DllImport("gdi32.dll")]
    public static extern bool BitBlt(
        IntPtr hdcDst,
        int    xDst,
        int    yDst,
        int    width,
        int    height,
        IntPtr hdcSrc,
        int    xSrc,
        int    ySrc,
        int    rasterOp
        ) ;
}

private Bitmap screen_capture()
{
    Bitmap bmp = new Bitmap(Screen.PrimaryScreen.Bounds.Width,
                            Screen.PrimaryScreen.Bounds.Height) ;
    Graphics g = Graphics.FromImage(bmp) ;

    IntPtr src_hWnd = IntPtr.Zero ;             // = Desktop
    IntPtr srcHDC   = USER32.GetDC(src_hWnd) ;  // 画面全体の HDC を取得
    IntPtr dstHDC   = g.GetHdc() ;              // bmp     の HDC を取得

    GDI32.BitBlt(                               // キャプチャの実行
        dstHDC, 0, 0, bmp.Width, bmp.Height,    //   コピー先 (= bmp)
        srcHDC, 0, 0,                           //   コピー元 (= 画面全体)
        GDI32.SRCCOPY) ;                        //   動作 = コピー

    g.ReleaseHdc(dstHDC) ;
    USER32.ReleaseDC(src_hWnd, srcHDC) ;

    return bmp ;
}
文字列の描画サイズを取得
// label1 の大きさを、その中の文字列に合わせる

| ⇒ |

|
private void button1_Click(object sender, EventArgs e)
{
// label1 の描画サイズを取得 (浮動小数点型で)
Graphics g = label1.CreateGraphics() ;
SizeF size = g.
MeasureString(label1.Text, label1.Font) ;
g.Dispose() ;
// label1 のサイズを合わせる
label1.Size = new Size(
(int)Math.Ceiling(size.Width), // Ceiling = 小数点切り上げ
(int)Math.Ceiling(size.Height)) ;
// 注) 上記、label1.Size = size.ToSize() ; と記述してしまうと、
// 小数点以下が切り捨てられるので駄目!
}
// Note: 文字列が特殊なパターンの場合、描画サイズを小さく見積もってしまうことが
// ある。たとえば、"iiiiiiii"などの場合(フォントタイプ、大きさにも依存)。
配置 PictureBox, Button, TextBox ; private void button1_Click(object sender, System.EventArgs e) { try { pictureBox1.Image = Image.FromFile(textBox1.Text) ; } catch { MessageBox.Show("指定が正しくありません!") ; } } // Note: 表示位置は、SizeMode プロパティで設定する。 // Normal = 左上隅に表示(既定値) // CenterImage = 中央 に表示 // AutoSize = 左上隅に表示(PictureBox の背景色は表示しない) // StretchImage = 画像を伸縮し、PictureBox の領域いっぱいに表示 // Note: PictureBox は、BMP/GIF/JPEG/PNG/TIFF/ICON 形式をサポートしている。
 配置
配置  配置
配置  // (1) 画像ファイル "image1.jpg" を埋め込む
ソリューションエクスプローラで、追加 →

 配置
配置  protected
  配置
配置  配置
配置  配置
配置